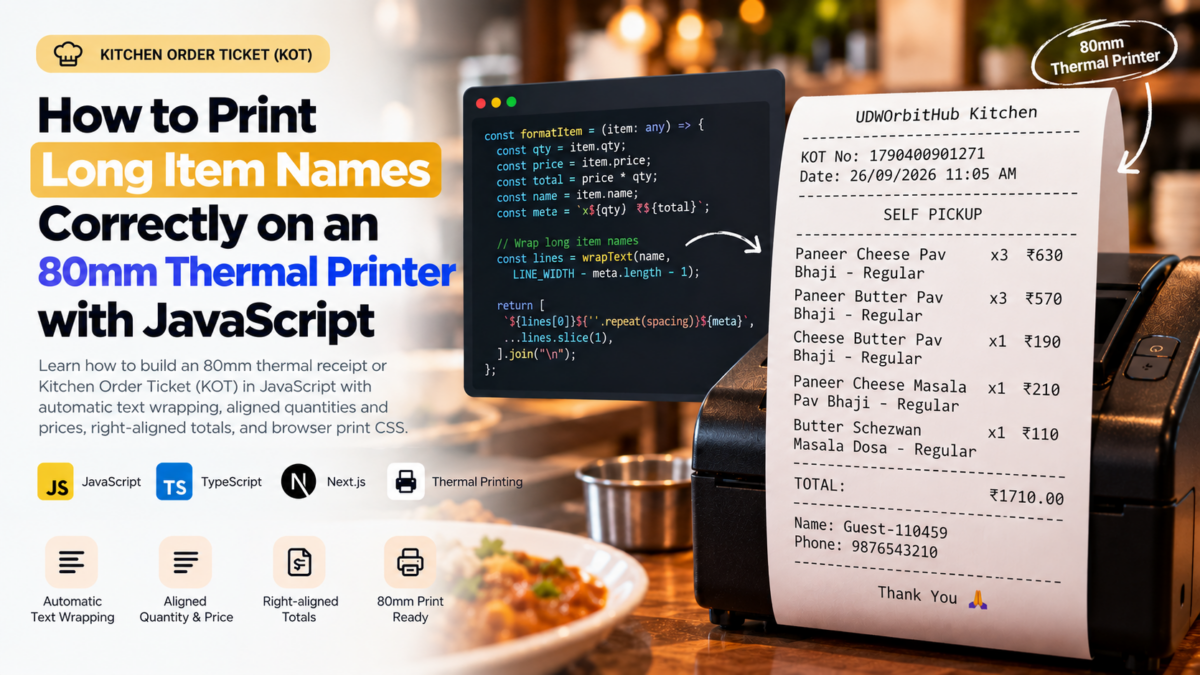
Printing receipts from a web application looks simple until you encounter a menu item with a long name.
A short item may print perfectly:
Butter Pav Bhaji x1 ₹150But a longer item can easily break an 80mm thermal receipt:
Paneer Cheese Pav Bhaji - Regular x1 ₹210The quantity or price may move outside the printable area, text may be clipped, or the printer may wrap the line at an unexpected position.
I encountered this while generating a Kitchen Order Ticket (KOT) using JavaScript and browser printing.
The solution was not to reduce the font size or truncate menu item names.
Instead, I created a small fixed-width text formatter that:
- wraps long item names automatically
- avoids cutting words where possible
- keeps quantity and price visible
- keeps the total amount right-aligned
- supports preparation options and notes
- prints consistently on an 80mm thermal printer
Here’s how it works.
The Original Problem
The initial formatter was straightforward:
const LINE_WIDTH = 32;

const formatItem = (item: any) => {
    const total = item.price * item.qty;

    const left = `${item.name} x${item.qty}`;
    const right = `₹${total}`;

    const spacing =
        LINE_WIDTH - left.length - right.length;

    return (
        left +
        " ".repeat(Math.max(1, spacing)) +
        right
    );
};
For short menu items, this works well:
Butter Pav Bhaji x1 ₹150The formatter calculates the space between the item description and price and inserts enough spaces to align the amount.
The problem starts when the item name becomes longer than the available width.
For example:
Paneer Cheese Pav Bhaji - Regular x1 ₹210There is no longer enough space for the item name, quantity, and price on the same line.
The calculation:
LINE_WIDTH - left.length - right.lengthbecomes negative.
Using:
Math.max(1, spacing)prevents an invalid number of spaces, but it doesn’t solve the real problem: the text itself is too long for the receipt.
Why 80mm Thermal Printing Needs Special Handling
An 80mm paper roll does not necessarily provide 80mm of usable text space.
The actual printable area depends on several factors:
- printer hardware margins
- printer driver settings
- browser print scaling
- CSS padding
- font family
- font size
- operating system print settings
For plain-text thermal printing, using a monospace font with a predictable character width makes formatting much easier.
In this example, I use:
const LINE_WIDTH = 32;Thirty-two characters is deliberately conservative.
Some 80mm printers can fit more characters per line, but using a slightly smaller width makes the receipt more reliable across different printers and browser print configurations.
Step 1: Create Basic Receipt Helpers
First, define the receipt width and helpers for separators and centered text.
const LINE_WIDTH = 32;

const line = () => "-".repeat(LINE_WIDTH);

const center = (text: string) => {
    if (!text) return "";

    const space = Math.max(
        0,
        Math.floor(
            (LINE_WIDTH - text.length) / 2
        )
    );

    return " ".repeat(space) + text;
};
Now:
line();produces:
--------------------------------And:
center("SELF PICKUP");produces approximately:
SELF PICKUPBecause a monospace font is used later, each space has a predictable width.
Step 2: Create a Reusable Text-Wrapping Function
Next, we need a utility that can wrap long strings without cutting normal words in the middle.
const wrapText = (
    text: string,
    width: number
): string[] => {
    if (!text) return [];

    const words = text
        .trim()
        .split(/\s+/);

    const lines: string[] = [];

    let current = "";

    words.forEach((word) => {
        /*
         * Handle an individual word that is
         * longer than the entire available width.
         */
        if (word.length > width) {
            if (current) {
                lines.push(current);
                current = "";
            }

            for (
                let i = 0;
                i < word.length;
                i += width
            ) {
                lines.push(
                    word.slice(i, i + width)
                );
            }

            return;
        }

        const next = current
            ? `${current} ${word}`
            : word;

        if (next.length <= width) {
            current = next;
        } else {
            if (current) {
                lines.push(current);
            }

            current = word;
        }
    });

    if (current) {
        lines.push(current);
    }

    return lines;
};
For example:
wrapText(
    "Paneer Cheese Masala Pav Bhaji Regular",
    20
);
can produce:
Paneer Cheese Masala
Pav Bhaji Regular
Instead of:
Paneer Cheese Masala P
av Bhaji Regular
This makes printed receipts significantly easier to read.
Step 3: Format the Item While Reserving Space for Quantity and Price
The important part is that the item description should be flexible, while the quantity and price should remain readable.
For example, we want:
Paneer Cheese Pav    x3 ₹630
Bhaji
rather than:
Paneer Cheese Pav Bhaji x3 ₹
630
We can accomplish this by calculating how much space the metadata requires first.
const formatItem = (item: any) => {
    const qty = Number(
        item.qty || 0
    );

    const price = Number(
        item.price || 0
    );

    const total = price * qty;

    const name = String(
        item.name || ""
    ).trim();

    const meta = `x${qty} ₹${total}`;

    /*
     * Reserve enough room on the first
     * line for quantity and price.
     */
    const availableWidth = Math.max(
        10,
        LINE_WIDTH - meta.length - 1
    );

    const words = name.split(/\s+/);

    let firstLine = "";

    const remainingWords: string[] = [];

    for (
        let index = 0;
        index < words.length;
        index++
    ) {
        const word = words[index];

        const candidate = firstLine
            ? `${firstLine} ${word}`
            : word;

        if (
            candidate.length <=
            availableWidth
        ) {
            firstLine = candidate;
        } else {
            remainingWords.push(
                ...words.slice(index)
            );

            break;
        }
    }

    /*
     * Handle an unusually long first word.
     */
    if (
        !firstLine &&
        remainingWords.length
    ) {
        const word =
            remainingWords.shift()!;

        firstLine = word.slice(
            0,
            availableWidth
        );

        if (
            word.length >
            availableWidth
        ) {
            remainingWords.unshift(
                word.slice(
                    availableWidth
                )
            );
        }
    }

    /*
     * Calculate spacing between the item
     * description and quantity/price.
     */
    const spacing = Math.max(
        1,
        LINE_WIDTH -
            firstLine.length -
            meta.length
    );

    const output = [
        `${firstLine}${" ".repeat(
            spacing
        )}${meta}`,
    ];

    /*
     * Remaining item description can use
     * the entire width of subsequent lines.
     */
    if (remainingWords.length) {
        output.push(
            ...wrapText(
                remainingWords.join(" "),
                LINE_WIDTH
            )
        );
    }

    return output.join("\n");
};
Now long item names wrap without pushing the price outside the receipt.
For example:
Paneer Cheese Pav    x3 ₹630
Bhaji
Another item might produce:
Paneer Cheese Masala x1 ₹210
Pav Bhaji - Regular
And an even longer item remains safe:
Paneer Tikka Butter  x2 ₹640
Masala Special Family Size
with Extra Cheese
Step 4: Support Preparation Options and Notes
Kitchen tickets often contain more than the product name.
For example:
Paneer Butter Pav    x1 ₹190
Bhaji
  No Onion, Less Oil
  Note: Extra spicy
You can build the items section like this:
const itemsBlock = cart
    .map((item: any) =>
        [
            formatItem(item),

            item.prepOptions?.length
                ? "  " +
                  item.prepOptions.join(", ")
                : "",

            item.note
                ? "  Note: " + item.note
                : "",
        ]
            .filter(Boolean)
            .join("\n")
    )
    .join("\n");
This keeps additional kitchen instructions underneath their corresponding item.
Step 5: Right-Align the Total Amount
The same fixed-width technique can also create a cleaner total row.
Instead of:
TOTAL: ₹1710.00we can print:
TOTAL: ₹1710.00Create another formatter:
const formatTotal = (
    total: number | string
) => {
    const left = "TOTAL:";
    const right = `₹${total}`;

    const spacing = Math.max(
        1,
        LINE_WIDTH -
            left.length -
            right.length
    );

    return (
        left +
        " ".repeat(spacing) +
        right
    );
};
Then use:
formatTotal(total);The result is:
--------------------------------
TOTAL:                  ₹1710.00
--------------------------------
This makes totals much easier to identify on a printed receipt.
Step 6: Build the Complete KOT
Here is a simplified version of the receipt builder.
This example uses dayjs for the timestamp.
View Complete Source Code section below in this page.
Step 7: Configure Browser Printing for 80mm Paper
Formatting the text correctly is only half of the solution.
The browser also needs to know that the output is intended for an 80mm thermal printer.
First, create a small HTML escape function.
const escapeHtml = (
value: string
) => {
return value
.replace(/&/g, "&")
.replace(/</g, "<")
.replace(/>/g, ">")
.replace(/"/g, """)
.replace(/'/g, "'");
};Escaping the receipt is important because item names, customer information, notes, and other values may contain characters that would otherwise be interpreted as HTML.
Then create the print function:
export const printReceipt = (
    text: string
) => {
    const printWindow =
        window.open("", "_blank");

    if (!printWindow) return;

    printWindow.document.write(`
        <!DOCTYPE html>

        <html>
            <head>
                <title>KOT</title>

                <style>
                    @page {
                        size: 80mm auto;
                        margin: 0;
                    }

                    * {
                        box-sizing: border-box;
                    }

                    html,
                    body {
                        margin: 0;
                        padding: 0;
                        width: 80mm;
                        background: #fff;
                    }

                    pre {
                        margin: 0;
                        padding: 4mm 3mm;
                        width: 80mm;

                        font-family:
                            "Courier New",
                            Courier,
                            monospace;

                        font-size: 12px;
                        line-height: 1.35;

                        white-space: pre-wrap;
                        overflow-wrap: break-word;

                        color: #000;
                    }

                    @media print {
                        html,
                        body {
                            width: 80mm;
                        }

                        pre {
                            width: 80mm;
                        }
                    }
                </style>
            </head>

            <body>
                <pre>${escapeHtml(text)}</pre>
            </body>
        </html>
    `);

    printWindow.document.close();

    printWindow.focus();

    setTimeout(() => {
        printWindow.print();
    }, 100);
};
The important CSS is:
@page {
    size: 80mm auto;
    margin: 0;
}
combined with:
font-family:
    "Courier New",
    Courier,
    monospace;
A monospace font is particularly important because the JavaScript formatter relies on characters having approximately equal visual widths.
Printing the KOT
Once the formatter and print function are ready, printing becomes straightforward:
const handlePrint = () => {
    if (!cart?.length) return;

    const text =
        buildThermalPrint({
            cart,
            customer,
            orderType,
            store,
            receiptNo,
        });

    printReceipt(text);
};
You can then connect it to a button:
<button
    type="button"
    onClick={handlePrint}
>
    Print KOT
</button>
Final Output
The resulting KOT can look like this:
         MY STORE Kitchen
--------------------------------
KOT No: 1790400901271
Date: 26/09/2026 11:05 AM
--------------------------------
          SELF PICKUP
--------------------------------
Paneer Cheese Pav    x3 ₹630
Bhaji - Regular

Paneer Butter Pav    x3 ₹570
Bhaji - Regular

Cheese Butter Pav    x1 ₹190
Bhaji - Regular

Paneer Cheese Masala x1 ₹210
Pav Bhaji - Regular

Butter Schezwan      x1 ₹110
Masala Dosa - Regular
--------------------------------
TOTAL:                  ₹1710.00
--------------------------------
Name: Guest Customer
Phone: 9876543210
--------------------------------
           Thank You
Long menu item names no longer push the quantity or price outside the receipt width.
The receipt also remains plain text, which makes it lightweight and suitable for thermal printing.
Why Not Just Use CSS word-wrap?
You could allow the browser to automatically wrap everything:
white-space: pre-wrap;
overflow-wrap: break-word;
But that alone doesn’t understand the structure of a receipt.
The browser might produce something like:
Paneer Cheese Pav Bhaji - Regular x3
₹630
or:
Paneer Cheese Pav Bhaji -
Regular x3 ₹630
That may technically fit, but it gives you less control over the kitchen ticket layout.
By formatting the text before printing, we explicitly tell the receipt:
- how wide a line can be
- where the item description should wrap
- where quantity should appear
- where price should appear
- how totals should align
CSS then handles the physical 80mm page.
The two approaches work together.
Why Use Plain Text Instead of an HTML Table?
HTML tables and CSS Grid can also produce excellent receipts.
However, plain-text formatting has some useful properties for thermal printing:
- simple output
- predictable layout
- easy debugging
- minimal CSS
- easy copying and logging
- works naturally with monospace printers
- straightforward alignment
For more sophisticated receipts containing logos, multiple columns, QR codes, taxes, discounts, or complex invoice structures, an HTML-based layout may be preferable.
For a KOT, however, fixed-width text can be an effective solution.
Important: Character Width Is Not Physical Width
One thing to keep in mind is that:
const LINE_WIDTH = 32;does not mean every 80mm printer can only print 32 characters.
Depending on the printer, font, DPI, and driver configuration, you may be able to use:
324042or even:
48characters per line.
Start conservatively and test with the actual thermal printer.
For example:
const LINE_WIDTH = 32;is safer than increasing the width until the text is almost touching both edges of the paper.
A small amount of unused horizontal space is usually preferable to clipped kitchen tickets.
Browser Printing Has Limitations
This implementation uses:
window.print();That means the browser and operating system still control the final print process.
Depending on the environment, users may still need to select:
- the correct thermal printer
- 80mm paper size
- appropriate margins
- 100% print scale
- header/footer disabled
For a web-based POS or restaurant ordering system, this approach works well when manual browser printing is acceptable.
If completely silent printing is required, a dedicated local printing solution or printer integration may eventually be necessary.
Final Thoughts
The key lesson is that thermal receipt formatting should not depend entirely on the browser deciding where text should wrap.
For a predictable 80mm KOT:
- use a monospace font
- define a maximum character width
- reserve space for quantity and price
- wrap long item names yourself
- right-align important numeric values
- explicitly configure the 80mm print page
- test against the physical printer
Instead of shrinking fonts or truncating menu item names, this approach lets the content naturally expand vertically while keeping the receipt width predictable.
That is usually exactly what you want from a thermal Kitchen Order Ticket.
Complete Source Code
The complete TypeScript implementation is available here:
View the 80mm Thermal KOT Printing Code → Coming soon this page.
Frequently Asked Questions
What line width should I use for an 80mm thermal printer?
There is no universal character count because it depends on the printer, font size, driver, and margins.
A value such as:
const LINE_WIDTH = 32;is a conservative starting point.
Test the result using the actual printer before increasing it.
Why should I use a monospace font?
The formatter aligns content by counting characters and inserting spaces.
With a proportional font, characters have different visual widths, so:
TOTAL: ₹1710.00may not align correctly.
A monospace font gives every character approximately the same width.
Can this work with a 58mm thermal printer?
Yes.
The same formatter can be used, but LINE_WIDTH, font size, and CSS width should be adjusted for the smaller paper size.
For example, you might start with a smaller line width and:
@page {
    size: 58mm auto;
}
The exact configuration should be tested against the target printer.
Can I print preparation options and kitchen notes?
Yes.
Because additional information is printed underneath the item, modifiers fit naturally:
Paneer Butter Pav    x1 ₹190
Bhaji
  No Onion, Less Oil
  Note: Extra spicy
This makes the same approach particularly useful for restaurant KOT printing.
Should I truncate long menu item names?
Usually, no.
For kitchen tickets, the full item name can be operationally important.
Allowing the description to wrap onto another line is generally safer than hiding part of the item name just to maintain a single-line layout.
If you’re building a restaurant POS, ordering application, or any web application that needs thermal printing, this fixed-width formatting approach provides a simple foundation that can later be extended for taxes, discounts, order numbers, QR codes, modifiers, and other receipt information.